Sunday, 15 January 2012

How to Apply a wash

You can buy pre-mixed washes but the best and cheapest way is to mix your own wash. I prefer to wash with diluted oil paint because it dries very slowly and it gives me plenty of time to correct any mistakes. It also flows easily into all the nooks and crannies the model and dosen't pool as acrylic wash often do. 


I usally mix up my wash with odorless thinner and black oil paint but depending on model and camouflage, I also use washes of burnt umber, sienna and other earth tones . The wash should be as thin as 20 parts thinner to one part paint if the wash is too strong, simply dilute with more thinner. When I'm satisfied with the mix, I just brush it on the model. I let wash sit for half an hour and then wipe off the excess with a rag moistened with thinner. Be sure to always wipe in the direction of the imaginary air flow over the fuselage. I use a damp cotton swab for tight places. I usually go over the model a second time more carefully this time with a smaller brush and concentrating more on details.


Wednesday, 11 January 2012

RAL PARTHA'S T'CHAR - DRAGON OF FLAME AND FURY


 I got this dragon as a birthday gift some fifteen years ago and it has since lain in a drawer, assembled but unpainted. Since I made ​​a New Year's resolution to finish all my unfinished projects I started with this the oldest one, the Ral Partha T'CHAR, a fitting start to the year of the Dragon. The kit is a multimedia kit with resin and metal parts so I had assembled all the parts with epoxy glue and primed the model with matt white paint before I put it in the drawer to ferment for fifteen year. I now only had to collect some courage and start painting. It proved to be quite simple, the body was painted red and orange and the wings were painted dark red-violet then the whole model got a dark wash. After details such as claws, horns and eyes had been painted I sprayed the model with Citadel Purity Seal.


Sunday, 8 January 2012

Revell Vasa


Scale: 1/150
Type: Injection moulded
Plastic parts: 330
Vacuum formed Sails
Hight: 345mm
Length: 455mm


A new model of the Swedish 17th century warship Vasa arrived just before Christmas and what an amazing Christmas gift it is. I always wanted to build a model of the Vasa, but the old Airfix Wasa was a pain to build and kit was based on the early wreck before the final restoration, and therefore lacked many parts and had a speculative rig. This new kit is a completely different business, Revell has worked closely with the Vasa Museum in Stockholm and this kit is incorporating all the latest research findings on the rig, colors and ship details. The real ship was painted in bright colors and decorated with lots of colorful characters and creatures so the kit will require a lot of patience and steady hands to paint and finish. Luckily it comes with a detailed manual with an extensive rig and painting instruction.


To celebrate the 50th anniversary of the salvaging of the Vasa The Swedish television has made ​​a 2 part documentary about the Vasa with the help of computer-generated graphics. (only in Swedish at the moment)


Part 1 http://svtplay.se/v/2658512/dokumentarfilm/vasa_1628_del_1
Part 2 http://svtplay.se/v/2658523/dokumentarfilm/vasa_1628_del_2


More information about the ship please visit http://www.vasamuseet.se/en/


Saturday, 7 January 2012

Tarangus Saab 32 Lansen


Scale: 1/48
Panel lines: Recessed
Type: Injection moulded short run
Plastic parts: 76
Resin parts: 2
Decal options: 2
Wingspan: 270mm
Length: 311mm


SAAB A32 Lansen (Lance) was a Swedish two-seater all weather attack aircraft from the mid fifties. Together with the J29 Tunnan (Barrel), the A32 Lansen formed the backbone of the Swedish Air Force in the fifties and sixties. It is a sleek, swept winged aircraft with a high thrust to weight ratio I've actually seen the airplane at an air show lifting from the runway, accelerate and then rise vertically like a Me 163 Komet to over 3000m (9000 ft). It was also the first Swedish-produced aircraft that could break the sound barrier, albeit in a slight dive. It is also one of my favorite planes so I'm very happy to see it in the 1:48 scale providing greater justice to this large aircraft than the old Heller kit in 1:72 scale. The kit is a modern low-pressure injection molded short run, which makes the parts a bit softer than high-pressure injection kits, but still the parts are very good and nicely defined. It's probably no shake n' bake but previous reviews show no major problems with the fit. Detail in the cockpit is a bit sparse, but two nice resin ejection seats is included. Most people will probably buy an etch set to upgrade the cockpit anyway. The decals are incredible with perfect registration and color but I would have liked an option with the colorful initial delivery scheme (bare metal with blue fin and orange nose cone) There are no armament included in the kit but there are a lot of armament and other bits and pieces in resin on the way from Maestro Models. The kit is expensive but truly unique and you will probably never see this aircraft kited from any of the main stream manufacturers.


Trumpeter F-105D Thunderchief

Scale: 1/72
Panel lines: Recessed
Type: Injection Moulded.
Plastic parts: 146
Decal options: 3
Wingspan: 149mm
Length: 287mm


One of the cool Century series aircraft. A modern tooling with a lot of details and parts. Surface detailing is in the form of recessed panel lines and rivets. Cockpit details are represented in the form of decals, a nice ejection seat and a control stick. Some different load alternatives as fuel tanks, Mk 82 bombs and AGM-12 missiles are supplied with the kit. The decals are not top quality like those that come with the recent AIRFIX and Revell kits but otherwise good enough.


Trumpeter Wellington Mk III

Scale: 1/72
Panel lines: Recessed
Type: Injection Moulded.
Plastic parts: 244
Decal options: 2
Wingspan: 229mm
Length: 188mm


This kit is a very fine molding with lots of internal details, but no bombs! this is strange, why they left out such a simple part. Nor is it possible to have the bomb doors open despite a wonderfully detailed bomb compartment. Too bad, it would have been an eye catcher painted, weather and fitted with yellow bombs. Otherwise, it will probably be easily built up to a beautiful model. Color instructions indicate Gunz color (white for Gunze acrylic and black for solvent-based Mr. Color) Both machines are painted in the standard dark green / dark earth upper surface pattern and matte black bottom and sides.


Friday, 6 January 2012

Eagle editon RLM chips. Comparison between Gunze acrylics and Tamiya mixes..

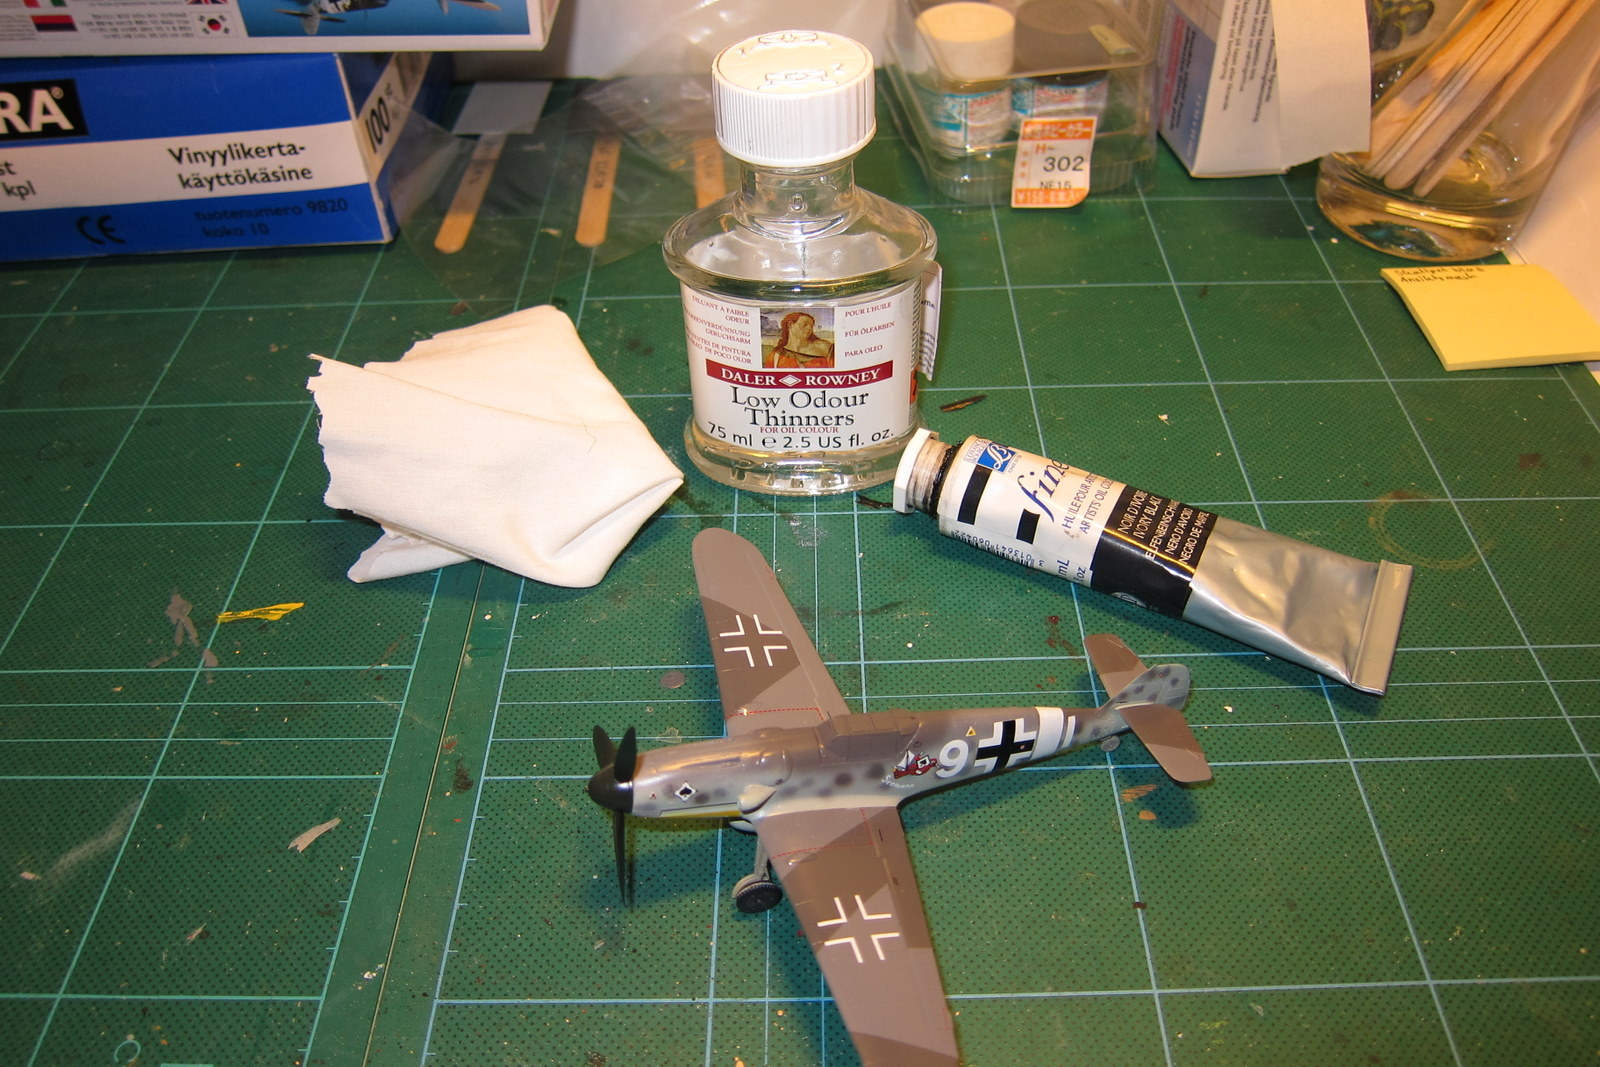
These pictures are taken in daylight and in raw format. Remember that it is useless to judge a color if your monitor is not calibrated correctly. I use a Spyder 3 Express to calibrate my monitor.


RLM 02
Gunze H70 is to light but perfect for 1:72 scale. This will probably look quite right after a wash. A very good starting point.


Tamiya XF22:1+ XF49:1 Is to brown and dark for any scale and useless in this form.


RLM 66
Gunze H416 is to light but perfect for 1:72 scale. This will probably look quite right after a wash or just add som black. A very good starting point.


Tamiya XF69:25 + XF2:1 is to dark but it's easy to lighten up the mix with a little more white.


RLM 74
Gunze's H68 RLM74 lack the green-gray tone and do not match at all.

Tamiya XF61 is a better match but a little too dark for the smaller scales. If you make the XF61 brighter with white it will probably also get a little grayer which is good.

RLM 75
Gunze's H69 RLM75 is a good match for 1:72 scale but needs to be darken for larger scales.

Tamiya mix of: XF54:15 + XF51: 8 + XF1: 3 is also a good match though somewhat too dark.

RLM 76

Eagle edition RLM 76 has a slight green tint entirely absent in Gunze 417. 

Tamiya XF23 mix of: 20 + XF25: 10 + XF3: 1 + XF2: 40 is a better match but slightly to green and dark, maybe it needs a little more white in the mix. The green tone seems a bit strong on the screen but is more subtle in real life. This makes me wonder if the mythical RLM 84 is just a varaition of RLM 76 due to lack of raw material to obtain the correct mixture but we must wait until a real scientist makes a pigment analysis similar to that made ​​to the royal warship Vasa's colours until we know for sure.